
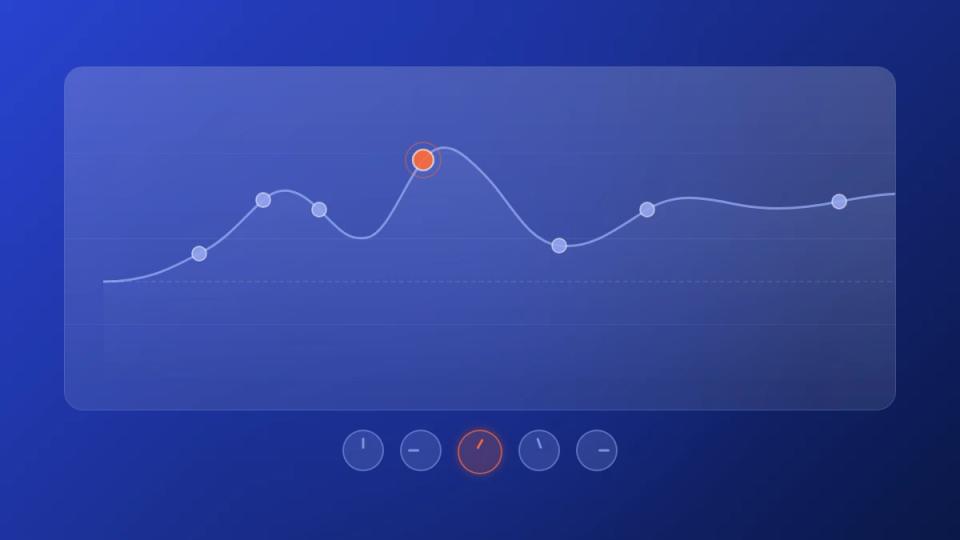
Fabfilter Pro Q3 is one of the fastest ways to protect your channel’s sound when a great submission arrives with a weak mix. That matters if you run premieres as a business. One muddy upload can make your whole page feel less curated, even if the track itself is strong.
For SoundCloud premiere channel owners, EQ is quality control. You’re not trying to rewrite the producer’s vision. You’re making sure every upload hits your audience with clarity, punch, and consistency, so your brand keeps sounding trusted.
Why your premiere channel needs an EQ strategy
A strong submission lands in your inbox at 4 p.m. The artist fits your lane, the label wants a fast turnaround, and the track has real premiere potential. Then you hit play and hear the problem right away. The low mids are foggy, the top end bites, or the stereo image feels lopsided.
That is a channel problem, not just a mix problem.
Listeners judge your page by what comes out of the speakers. If one upload sounds smeared or abrasive next to the rest of your catalog, your curation feels weaker. On a SoundCloud premiere channel, sonic consistency protects trust, and trust keeps labels, managers, and artists coming back.
fabfilter pro q3 earns its place here because it is fast to read and fast to act on. You can make targeted corrections without turning a premiere workflow into a full remix session. That matters when you are balancing approvals, artwork, scheduling, and promotion on a deadline.
Treat EQ like release QC
I look at EQ as part of final channel quality control. The goal is not to stamp every submission into the same tone. The goal is to catch the few tonal issues that make a promising record sound undercooked on your page.
A practical EQ process helps you:
- Keep your catalog tonally consistent: Tracks still keep their identity, but they stop jumping out for the wrong reasons.
- Reduce back-and-forth with senders: Minor problems can be fixed in-house instead of slowing the premiere with revision emails.
- Protect playback across systems: A track that barely works on studio monitors can fall apart on earbuds, laptops, or car speakers.
Time matters here. Premiere channels do not get paid for endless micro-decisions. They get paid for publishing strong records quickly, with standards the audience can hear.
Set a simple pass-fail check before upload
Before anything goes live, run the file through the same listening check every time. Start with your main monitors. Confirm the low end is controlled, the upper mids are not aggressive, and the lead elements still read clearly when the arrangement gets dense. Then switch to headphones and make sure the stereo balance still makes sense.
If a track misses on one of those points, Pro-Q 3 is usually the first plugin to open because it lets you correct the issue without slowing the whole release process. Some tracks need one cut and they are ready. Others need a few careful moves and a call on whether the record still represents your channel well.
If your work also includes spoken promos, branded intros, or interview content around premieres, this guide on how to improve audio quality and sound like a pro podcaster is useful for hearing how clarity choices carry over outside music releases.
Clean up muddy mixes in minutes
A submission lands an hour before your scheduled premiere. The arrangement is strong, the artist has momentum, and the comments will be brutal if the upload sounds cloudy next to the rest of your catalog. That is why fast EQ cleanup matters. You are not polishing for vanity. You are protecting the standard your channel is known for.

Start with subtraction
On premiere prep, broad boosts are rarely the first answer. Mud usually comes from overlapping information, not a lack of tone. The fastest win is clearing the collisions that make a good record sound amateur once it hits SoundCloud compression and cheap playback systems.
My first pass is simple:
- Insert Pro-Q 3 on the stereo file
- Turn on the analyzer
- Audit the busiest section while listening
- Cut obvious resonances before touching shelves
- High-pass only when there is real low-end waste
Pro-Q 3 gives enough band control and filter flexibility to make these decisions quickly without turning a premiere check into a full remix. That matters when you are reviewing multiple submissions in one sitting.
Find the ugly spot fast
The analyzer helps, but your ears make the call.
Loop the drop, chorus, or densest section. Set a bell filter with a moderate Q. Sweep until the ring, boxiness, or brittle edge clearly jumps out. Solo the band for a second if needed, then cut less than your instincts tell you to.
Small moves hold up better on finished stereo files. A 1 to 3 dB cut in the right place often does more than a dramatic scoop that makes the graph look tidy but strips the record of impact.
I use one rule here. If the mix gets cleaner but loses urgency, I undo the move and cut less.
Clear low-end waste without killing the weight
A lot of submissions arrive with junk below the useful bass range. That low rumble eats headroom, smears the kick, and makes the master limiter work harder than it should. On a premiere channel, that can turn an otherwise solid track into a weak upload.
Use a high-pass filter only when the source needs it. If the sub is part of the track’s identity, protect it. If the bottom octave is just flapping around and masking the kick, trim it.
Here’s the quick decision table I rely on:
| Problem | Likely move | What to watch |
|---|---|---|
| Rumble below the musical bass | Add a low cut | Don’t remove intentional sub energy |
| Kick feels swallowed | Cut competing low-mid buildup | Clean first before adding punch tools |
| Mix sounds boxy | Small bell cut in low mids | Avoid scooping the whole record |
| Hats feel brittle | Narrow cut in the harsh area | Keep the track lively |
If the groove still feels flat after cleanup, transient shaping or sidechain tools may be the better next step. For dance submissions, this overview of the Nicky Romero Kickstart plugin for cleaner pump and separation pairs well with Pro-Q 3 cleanup.
If the issue is hiss, hum, or broadband contamination instead of tonal buildup, EQ is the wrong first tool. This roundup of the best software to remove noise from audio is worth saving for restoration-heavy submissions.
Use broad shelves last
Once the mud is gone, you can judge whether the record still needs tonal shaping. That order saves time and prevents over-processing.
Common finishing moves:
- A slight high shelf for uploads that feel dull or closed in
- A small low shelf cut for bass-heavy submissions that blur the groove
- A gentle presence lift when the lead sits behind the backing track
Do not stack all three because the option is there. On premiere material, one broad move is often enough to make the file feel release-ready without changing the artist’s intent.
Here’s a useful walkthrough if you want to see fast cleanup decisions in action:
Pick the right processing mode for the job
Zero Latency is usually the right call for first-pass correction. It keeps the session responsive and lets you move quickly through a queue of pending uploads.
Linear Phase can help in specific cases, but it is not automatically better. On a stereo submission, speed and judgment usually matter more than chasing a technically cleaner mode that slows decisions or changes the feel.
A fast first-pass checklist
Before you sign off on the file, ask four blunt questions:
- Is the low end cleaner?
- Did the harsh area stop poking out?
- Does the track still feel like the same record?
- Would you publish this under your channel name today?
If the answer is yes, stop there. Premiere channel owners make money by releasing strong records on time, not by spending forty minutes fixing problems the audience will never notice.
Use dynamic EQ for professional punch and clarity
A submission lands in your inbox with the right idea, the right label support, and real premiere potential. Then the drop hits, the hats get sharp, the bass note on F swells too hard, and the whole record starts sounding less expensive than your channel should.
That is where dynamic EQ earns its place in a premiere workflow.
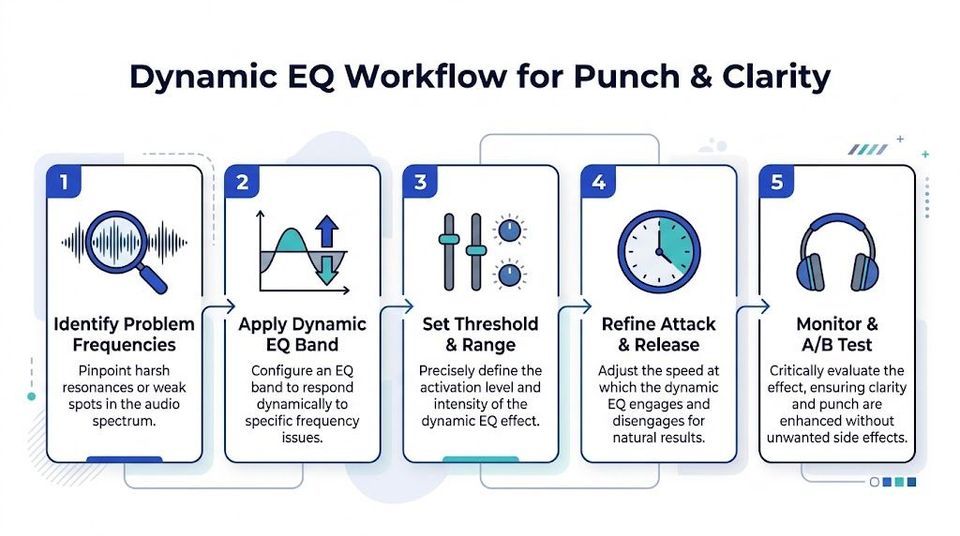
Static moves handle problems that stay put. Dynamic EQ handles problems that only jump out when the arrangement gets denser or the master hits harder. For premiere channel owners, that distinction matters because you are often working on finished stereo files. You need fixes that clean up the track without flattening the moments that made you want to post it.
Tame harsh hats without dulling the groove
One of the fastest ways to cheapen a premiere is letting the top end turn aggressive in the loudest section. The intro feels fine. The break feels fine. Then the drop arrives and the hats or bright synth layer start scraping at the listener.
A static cut can solve the harshness, but it often takes the excitement with it.
A better move is to place a bell band on the problem area, enable dynamic mode, and set it to pull down only when those peaks jump forward. Start with a modest range. Then lower the threshold until the band reacts in the loud section but stays mostly out of the way in the quieter parts.
If the drop gets smoother and the breakdown still breathes, you are close.
Working rule: If the problem only appears when the track opens up, treat it dynamically.
Control a boomy bass note and keep the weight
A lot of electronic submissions have one bass note that blooms harder than the rest. On a channel release, that kind of inconsistency stands out quickly. The listener may not name the frequency, but they hear the track lose control for a moment.
Dynamic EQ is a practical fix because it lets you target the note area without thinning the whole low end. Find the problem frequency first. Then use a narrow to medium band with gentle dynamic reduction so the cut only happens when that note overfires.
This is also the point where judgment matters more than features. If you clamp down too hard, the groove gets smaller. If you stay restrained, the bass still feels strong but no longer floods the limiter or clouds the kick.
If the low end issue is rhythmic rather than tonal, a sidechain tool may be the better answer. This breakdown of the Nicky Romero Kickstart plugin is useful for spotting when space needs to be created by movement instead of EQ.
A fast setup for submitted masters
On stereo submissions, speed matters. So does restraint.
My usual setup looks like this:
- Find the trigger point first: Sweep the band and confirm the exact area that misbehaves
- Keep the dynamic range modest: Small moves usually sound more expensive than aggressive ones
- Set the threshold by section: Check the loudest part of the drop, not just the intro loop
- A/B at matched level: Louder often sounds better for ten seconds and worse after upload
- Recheck the breakdown: Make sure the correction does not leave the quieter section feeling lifeless
That process is fast enough for a release queue and controlled enough to protect the artist’s intent.
Know what dynamic EQ will not solve
Dynamic EQ will not rescue a brittle master that is harsh all the time. It will not fix kick and bass conflicts caused by arrangement choices. It will not turn a weak mix into a release-ready record by itself.
It does excel at three common premiere problems:
- Peaky upper mids that jump out only on stronger vocal or lead notes
- Intermittent hi-hat glare that appears in dense sections
- Low-end overbloom from specific bass moments rather than the entire bass line
That is why I use it as a finishing tool, not a magic trick. It is one of the cleanest ways to make a submission feel more controlled while keeping the energy intact.
For a premiere channel, that balance matters. You want the track to hit hard, translate well, and still sound like the artist approved the final result. Dynamic EQ helps you get there quickly, which is exactly the kind of decision-making that protects your brand.
Add stereo width and depth using mid/side EQ
A submission can have the right tonal balance and still fail on your channel because the stereo image feels sloppy. The kick drifts wide, the pads smear across the vocal, or the top end sprays out to the sides and makes the whole record feel cheap on headphones.
Mid/side EQ is one of the fastest ways to tighten that up in Pro-Q 3.

For a SoundCloud premiere channel, this matters more than people admit. You are not only judging whether a track is good. You are deciding whether it will sit next to every other upload on your page without making your curation feel inconsistent.
Keep the low end in one place
My first check is always the side channel below the bass fundamentals. If there is too much low information living out wide, the master loses authority fast and the groove gets less reliable from system to system.
The fix is simple. High-pass the Side channel and leave the Mid channel alone. You are not thinning the record out. You are stopping the sub and low bass from blurring the center image.
This is especially useful on melodic house, progressive, and techno submissions where wide synth layers make the bottom end feel bigger than it really is.
Wide bass grabs attention. Centered bass translates.
Add width higher up, where it helps
If a submission feels too narrow, I rarely start with a stereo imager. A gentle shelf or broad bell on the Side channel in the upper mids or highs usually gives me more space with fewer problems.
That move needs restraint. A small lift can open the edges and keep the center intact. Too much, and the vocal, snare, or lead starts to feel disconnected from the track.
I always check that decision on both monitors and headphones. Premiere listeners will do the same, even if they do not know the term mid/side EQ.
If you want more context on how current producers are building width and arrangement space before the master stage, this breakdown of Ableton Live 12 workflows for modern electronic production helps explain why so many submissions arrive with similar stereo habits.
Create depth by removing side clutter
Some records do not need more width. They need cleaner contrast between the center and the edges.
A small cut on the Side channel in the crowded midrange can make the vocal, lead, or main hook feel more forward without touching the Mid channel at all. That is one of the most useful Pro-Q 3 moves for premiere work because it improves focus without sounding obviously processed.
I reach for it when the track has one of these problems:
- Wide pads masking the vocal or topline
- Lead synths losing shape once the chorus or drop fills out
- A center image that feels weak even though the mix is bright enough
Use mid/side EQ as quality control
Streaming exposes exaggerated stereo choices fast. If the sides carry too much low energy or too much harsh top end, the track can sound unstable across earbuds, laptops, DJ prep, and car playback.
That is why I treat mid/side EQ as a consistency tool. It helps each premiere feel polished and controlled, even when submissions come from very different producers and mix rooms.
A quick reference:
| Goal | Mid move | Side move |
|---|---|---|
| Tighten low end | Leave center bass intact | High-pass low side content |
| Add air | Keep center stable | Gentle high shelf on sides |
| Improve focus | Keep vocal or lead anchored | Small cut in the masking range |
Small spatial corrections like these do more than improve one record. They help your whole channel sound curated, reliable, and worth following.
Solve common issues with advanced EQ techniques
A lot of Pro-Q 3 advice online stops at basic cuts and dynamic bands. That’s useful, but it leaves out the stuff that saves problem submissions.
The bigger issue is the myth that a digital EQ is always invisible if you use it carefully. In practice, your choice of mode and your tolerance for side effects matter.

Don’t ignore transient complaints
FabFilter forum users have reported that Pro-Q 3 can alter transients even with default settings, and multiple reports since 2023 point to this as a real concern in some high-resolution electronic workflows (FabFilter forum discussion).
That doesn’t mean the plugin is flawed. It means you should stop assuming every mode behaves the same in every context.
If a submitted master loses punch after insertion, test before making any EQ move:
- Bypass match carefully: Make sure you’re hearing the plugin, not a level change.
- Switch processing mode: Zero Latency, Natural Phase, and Linear Phase won’t feel identical.
- Check transient-heavy passages only: Kicks, claps, and plucks reveal issues faster than pads.
Reality check: If the kick loses impact the moment the insert is active, don’t keep tweaking bands. Change the conditions first.
Use reverse dynamic behavior with intent
There’s also a more advanced dynamic trick that doesn’t get explained well. Some users want a band to lift quieter content, then stop boosting or even rein in louder moments. That kind of reverse dynamic behavior is useful for bringing out detail without constant static boost.
The trap is trying to force it like a normal compressor. It works better when the target is narrow and musical, such as presence on a buried lead or body on a thin texture that only disappears in softer passages.
I use that idea cautiously on submissions because it’s easy to overcook. If the enhancement becomes obvious, it stops sounding like polish and starts sounding like repair.
Situations where it can help:
- A soft synth line loses definition in breakdowns
- A vocal texture drops back too far when the arrangement thins out
- A percussion layer needs support only in lower-energy moments
Match tone without copying someone else’s master
Reference matching is a major time saver when your channel has a clear sonic identity. You don’t need every uploaded track to sound identical, but you do want them to live in the same neighborhood.
The smart way to use EQ Match is to treat it as a suggestion. Analyze a reference that fits your channel, apply the match, then reduce and edit the curve until only the useful direction remains.
This is especially practical when you’re handling a batch of tracks from different labels before a busy release week.
A solid process:
- Choose one reference from your own recent uploads
- Match broad tone, not tiny notches
- Delete exaggerated nodes
- Listen on speakers, then headphones
- Keep the submission’s identity intact
Choose the mode for the task, not the marketing line
The right Pro-Q 3 mode depends on what you’re fixing.
| Situation | Safer starting choice | Why |
|---|---|---|
| Fast corrective cuts on a submitted stereo master | Zero Latency | Efficient and predictable for quick work |
| Tonal shaping where feel matters | Natural Phase | Often a better balance of control and musicality |
| Specific phase-sensitive correction | Linear Phase | Useful when the trade-off is worth it |
If you want more perspective on final polish decisions in online mastering contexts, this piece on master sound online complements the workflow above.
The main takeaway is simple. fabfilter pro q3 is powerful, but it isn’t self-driving. Great results come from choosing the right move for the exact problem, then stopping before the tool starts announcing itself.
Turn great tracks into unforgettable premieres
A strong premiere channel doesn’t just pick good music. It presents good music at a reliable sonic standard. That’s what makes listeners trust your uploads and makes labels comfortable sending you bigger records.
fabfilter pro q3 helps with that because it covers the fixes that matter most in practical workflows. You can clean mud quickly, control harsh peaks without flattening energy, shape stereo image with intent, and solve edge-case problems other tutorials ignore.
That’s not vanity mastering. It’s operational discipline.
Three habits separate a respected channel from a messy one:
- Reject less, correct better: Minor issues shouldn’t derail a strong submission.
- Work from a repeatable process: First-pass cleanup, dynamic control, stereo check, final A/B.
- Protect identity over intervention: The channel should sound polished, not overprocessed.
Listeners rarely tell you, “great job on that subtle dynamic band around the harsh hats.” They just feel that your uploads hit right. Labels notice the same thing from the other side. Their unreleased tracks land on a page that sounds curated and taken seriously.
That matters if premieres are part of your business model. Sound quality is part of the product, whether you invoice for the slot directly or use premieres to drive reputation, repost demand, and follow-on opportunities.
The technical side also gets easier once your process is stable. You spend less time debating every submission and more time deciding whether the record fits your audience. That’s where a premiere channel should spend its energy.
If you run premieres or reposts as a business, Premierely gives you the system around the audio work. Accept track submissions, collect payments through Stripe Connect, schedule uploads, automate SoundCloud posting, and use download gates to collect emails plus likes, reposts, comments, and follows from one dashboard.